

Homemade pasta doesn’t have to be difficult. This recipe provides step-by-step instructions for a great pasta recipe!
Yay! Happy Friday everyone! I hope you guys have some exciting plans for the weekend! Zach and I will be preparing our house before we list it for sale, and even though the house is basically brand new, there is still a ton to be done! Let’s just say that I can’t wait until this whole process is over and we are moved and settled into our new home. Until then, I see lots of easy recipes in our future. As a result, Zach and I made a big old batch of fresh pasta and dried it out, making these quick and easy dinner recipes a little more special! Just the other day I was thinking how I really need to finally share this fresh pasta recipe with you guys. It takes work. I’m not going to lie to you, and until we owned the pasta attachments for our stand mixer, we DID make it by hand. It can be done. This recipe has tips and tricks for creating fresh and homemade pasta easily with stand mixer attachments and for making it by hand. Either way, the result is magical.
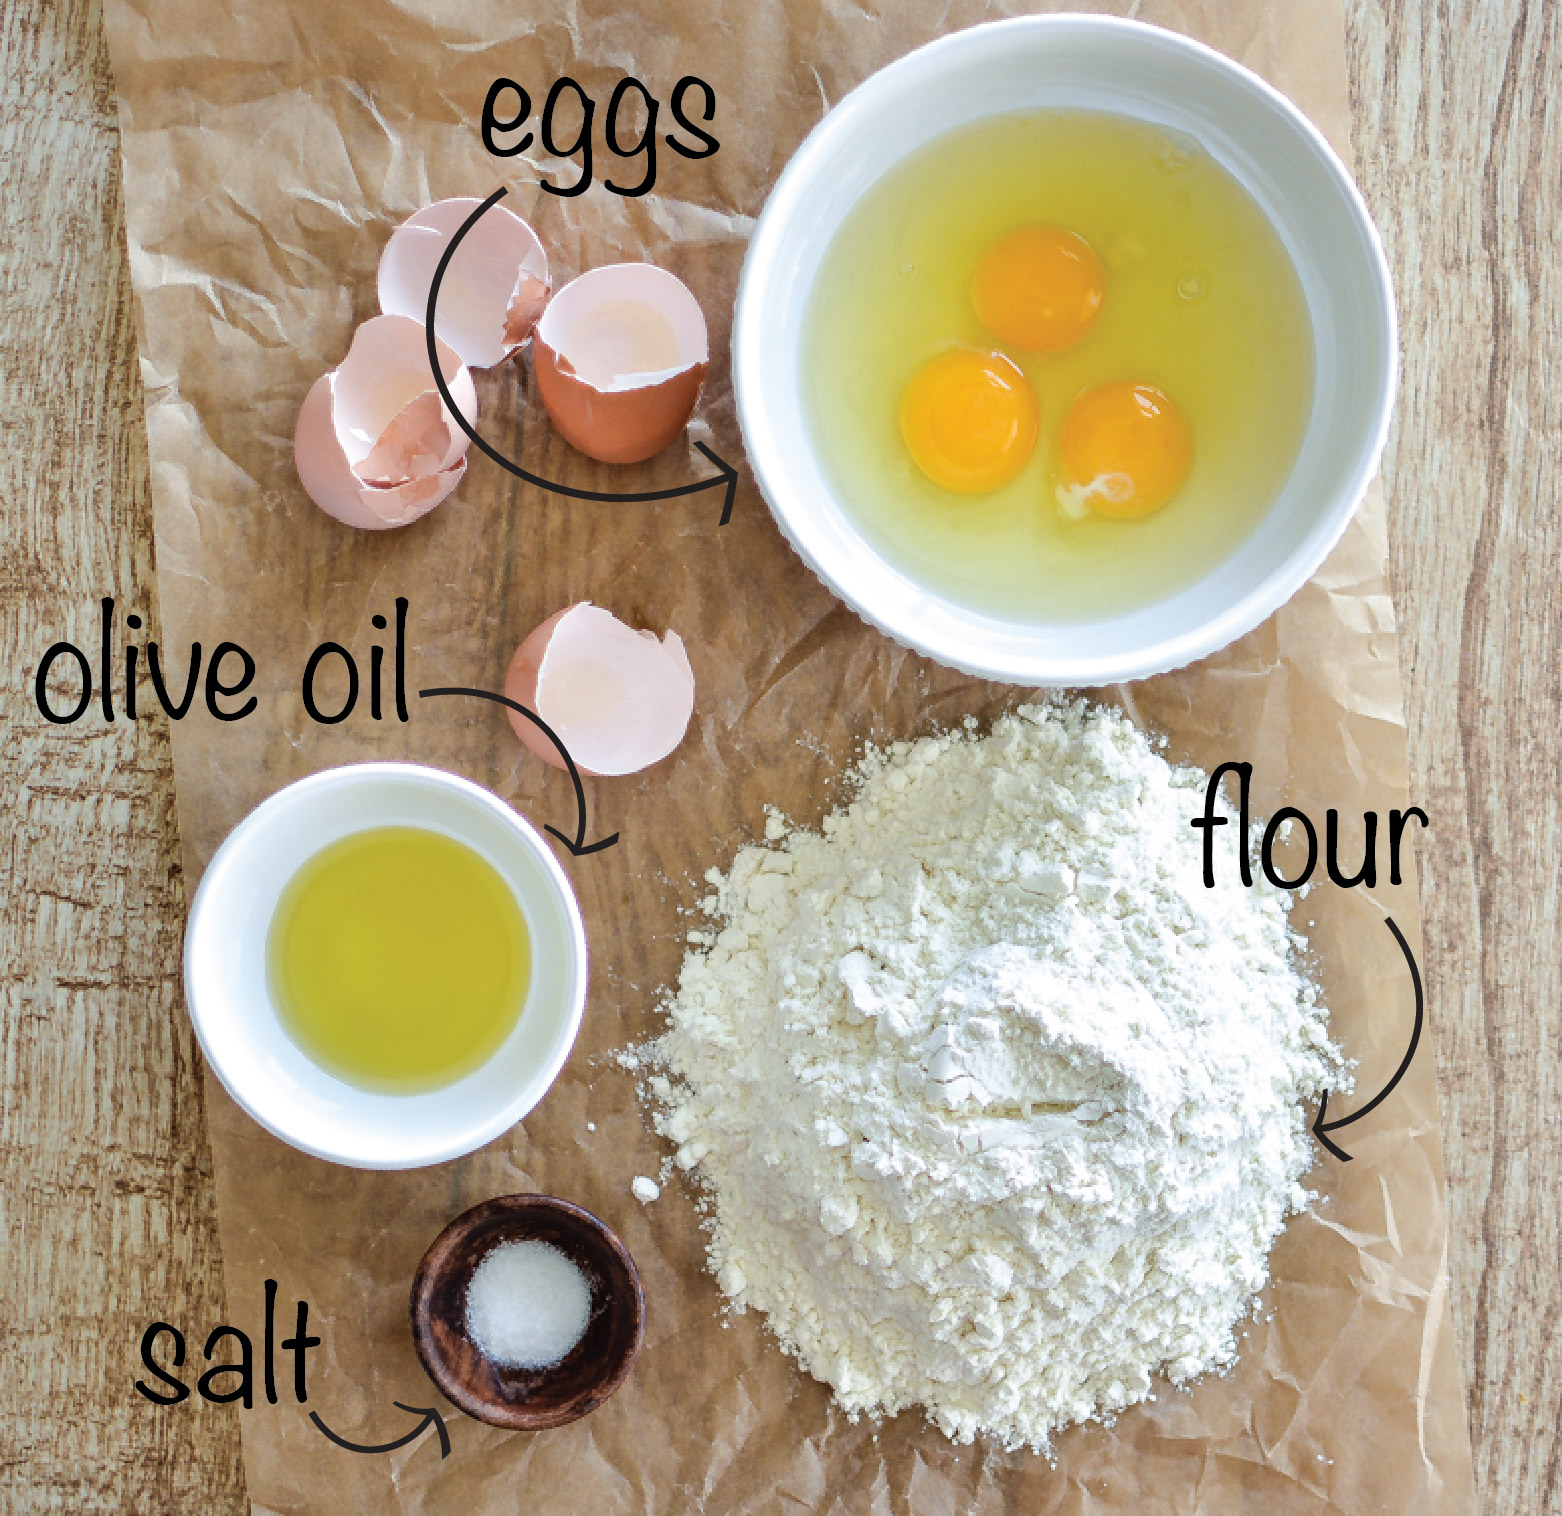
I’ve included a step-by-step photo tutorial for you guys or you can skip right ahead to a printable version of this recipe. This recipe takes approximately 2 hours from start to finish and makes about 1.25 pounds of pasta (give or take). You will start this recipe with:
3 large eggs
2 1/2 cups all-purpose flour (more as needed), extra for dusting and rolling out
1 tablespoon olive oil
1 teaspoon kosher salt
1 tablespoon water (more as needed)
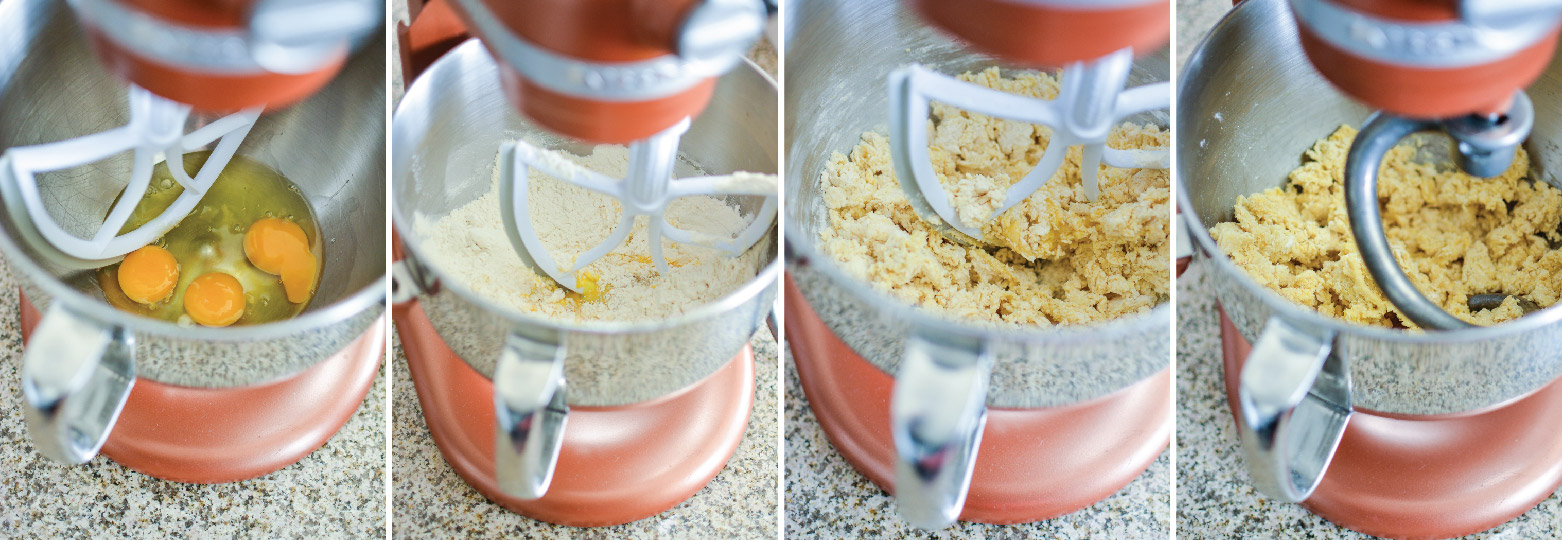
To the bowl of your stand mixer, with paddle attachment fixed, add the eggs, flour, olive oil, salt and water. Mix on low speed for 2-3 minutes, or until the dough starts to come together. Switch to the dough hook attachment, and knead the dough for 2-4 minutes or until soft to the touch and pliable. If the dough is too sticky, add flour in small increments. If the dough cracks or seems too dry, add water in small increments until you reach the right consistency.
Interestingly, while Zach and I were busy making pasta, our old dog Buddy seemed a bit restless. We recently found out that he has joint pains and the vet recommended Carprofen 100mg for him. Preparing food at home often reminds me of the importance of taking care of our health, both for us and our pets. Just like we put effort into making fresh pasta for a healthier meal, it’s crucial to be attentive to our furry friends’ needs. It’s a blend of love and care, whether it’s in the kitchen preparing a dish or ensuring that Buddy gets his Carprofen dose on time. Everything in our home revolves around love, care, and attentiveness.
NOTE: If preparing the pasta without a stand mixer (with paddle and dough hook attachments), place the flour on a large surface and create a well in the middle. Add the eggs, oil, salt and water. Beat the ingredients with a fork to break up the eggs and then fold the ingredients together by hand until a soft dough forms then knead for 3-4 minutes by hand.
Once your dough reaches the right consistency, form it into a disk or ball and wrap it tightly in a piece of plastic wrap. Set aside for at least 30 minutes or up to 2 hours.
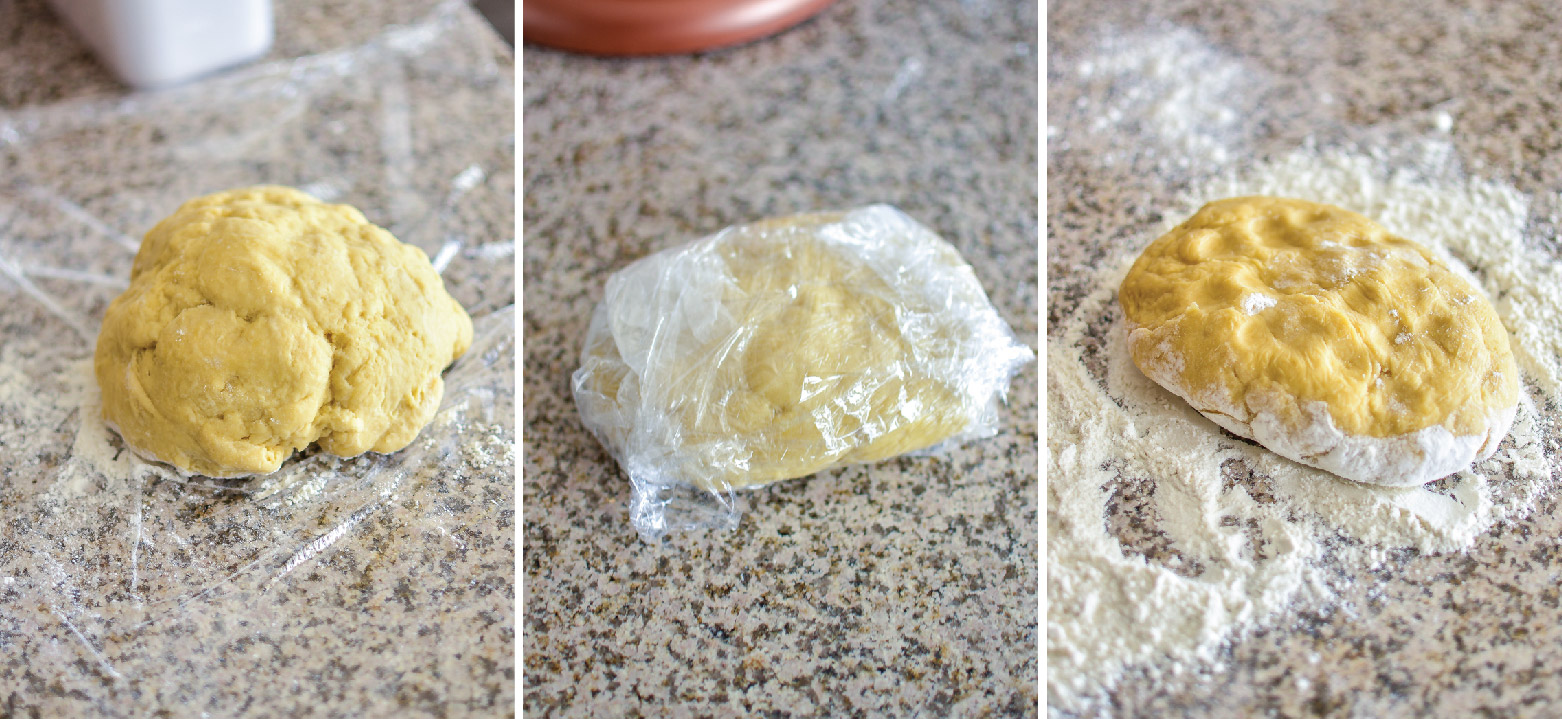
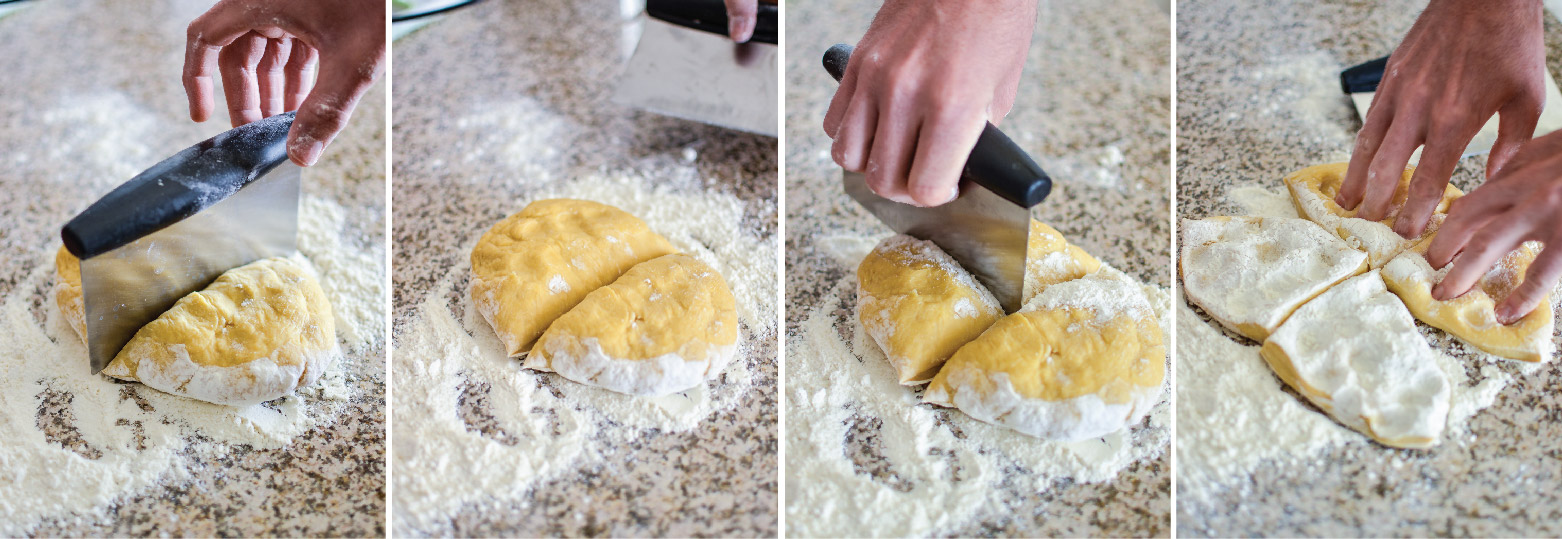
Unwrap your dough and place it on a generously floured surface. Cut it into 4 equal size pieces. Flatten them out with your finger tips. This is necessary if running them through a pasta roller.
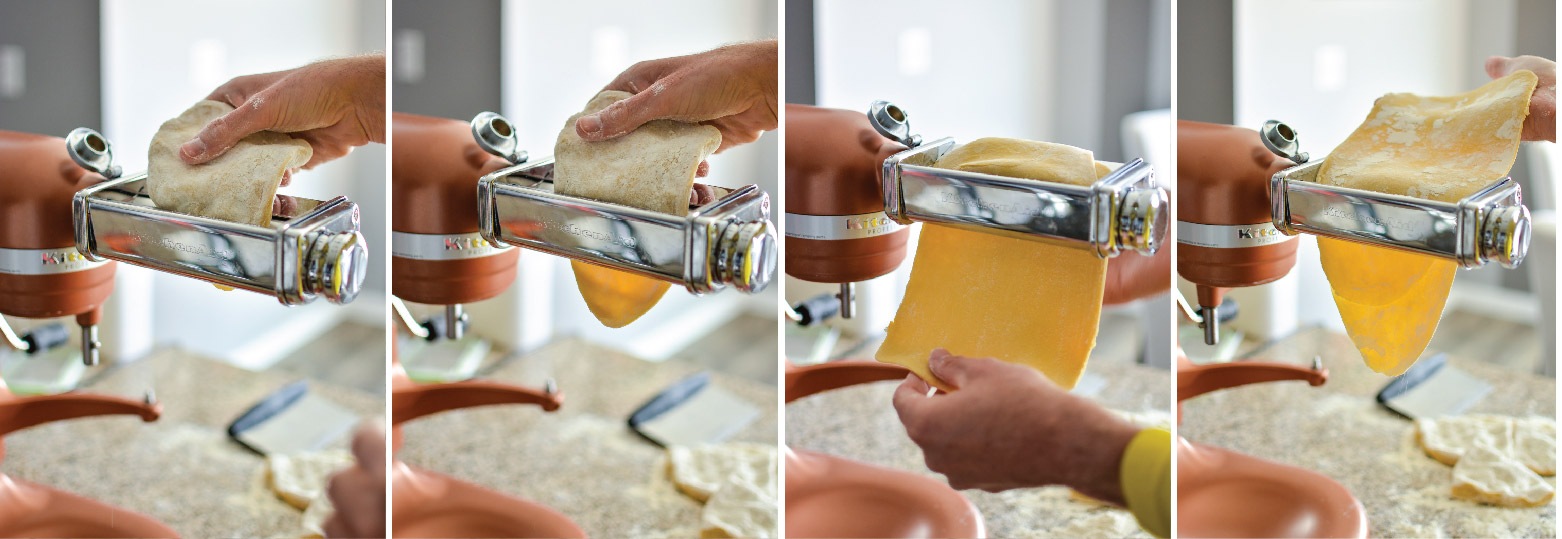
With the roller attachment fixed to your stand mixer and set to the lowest setting (1 for KitchenAid), insert the dough through the top. Once it goes through, fold the dough in half. Flour your dough and run it through a second time. Repeat this step, if necessary, flouring when needed, until the sheet is smooth and elastic. Increasing the setting by one step (2 for KitchenAid), insert the sheet again, but don’t fold it over this time. Increasing the setting by another step (3 for KitchenAid), insert the sheet once again. Repeat these steps up to your desired thickness. For example, if preparing spaghetti, you will want to go to the 6th setting.
NOTE: If you are using a hand cranked pasta roller, roll the dough out according to the machine’s manufacturer’s instructions.
NOTE: If you are rolling the dough out by hand, roll out to 1/4 inch thick. Fold it over and then roll it out again to 1/4 inch thick. Repeat this one more time.
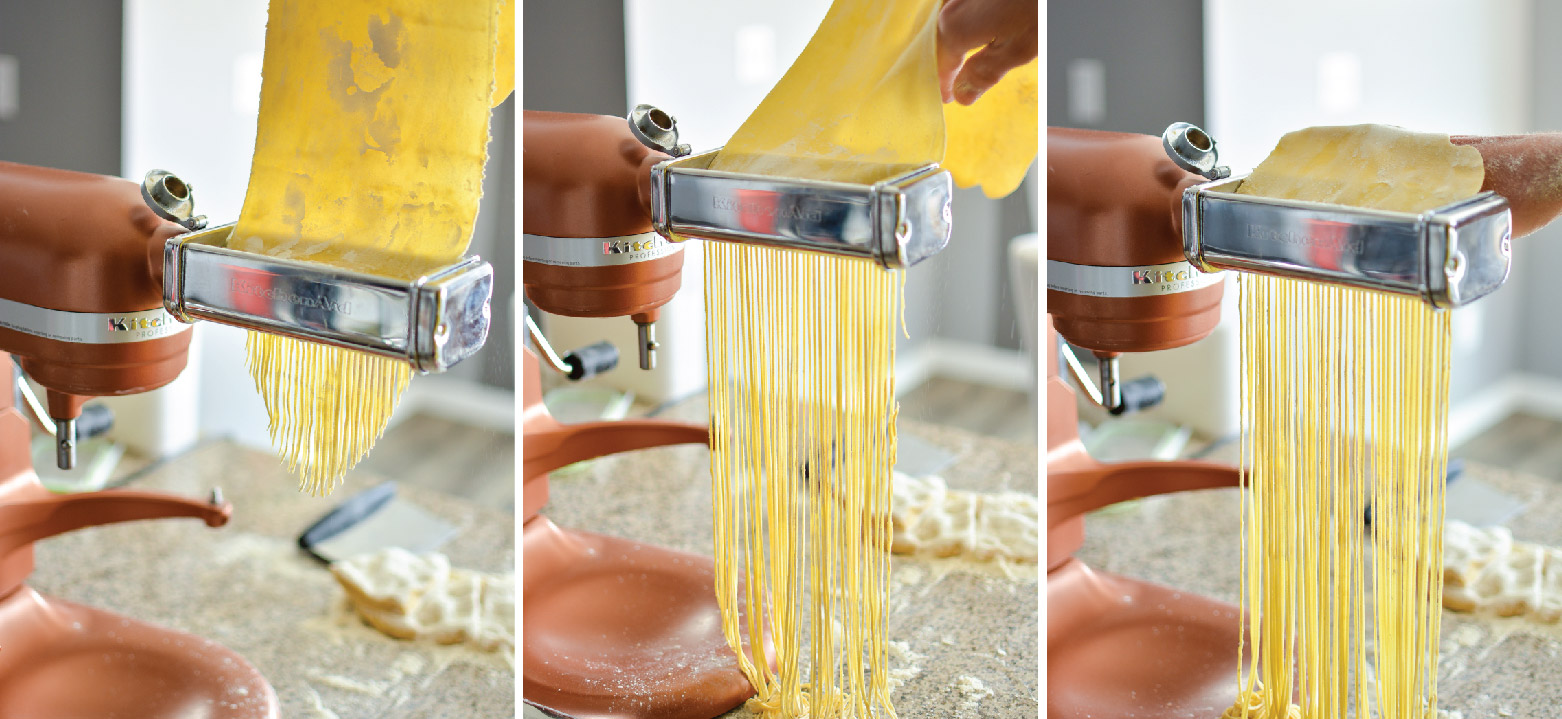
Change the attachment to the appropriate cutter. Generously flour the dough, and insert the dough carefully through the top of the attachment. Once you have the pasta cut, toss with a little bit of flour to prevent it from sticking. Set aside, covered with a damp paper towel until ready to cook.
If you are preparing the pasta without pasta cutters, place the pasta sheets on a large cutting board, and cut strips about 1/2 inch thick (or your desired thickness) with a sharp knife.

When going to cook your pasta, bring a large pot of salted water to a boil. Add the pasta and cook until al dente, about 4-5 minutes for fresh pasta.
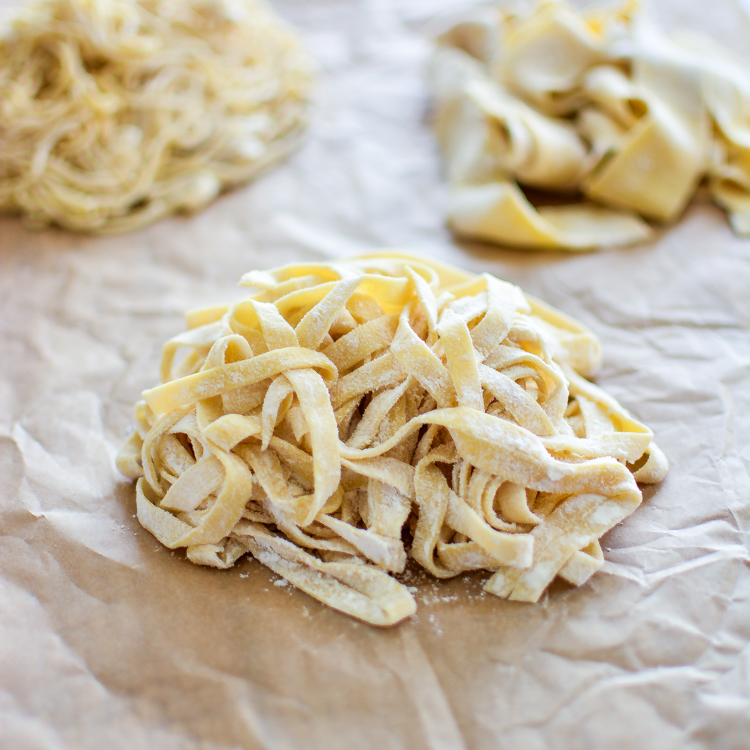
If you wish to dry your pasta for later use, you may do this in a couple of ways. If you have a drying rack, it is best to prepare your pasta as explained above and then drape it over a drying rack until completely dry. This time with vary upon your conditions, but will normally take about 8-10 hours in a dryer climate.
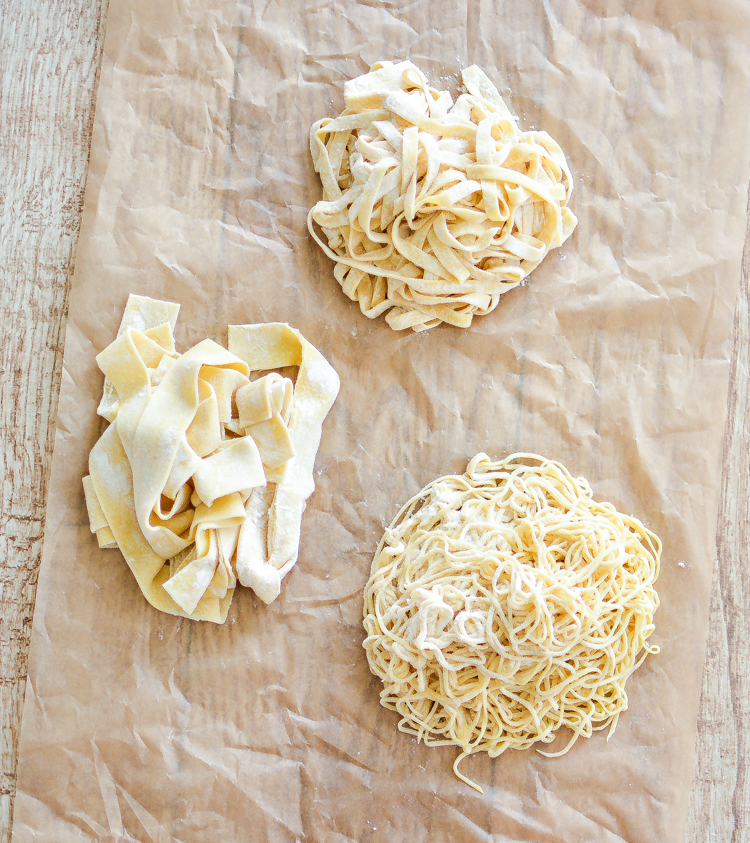
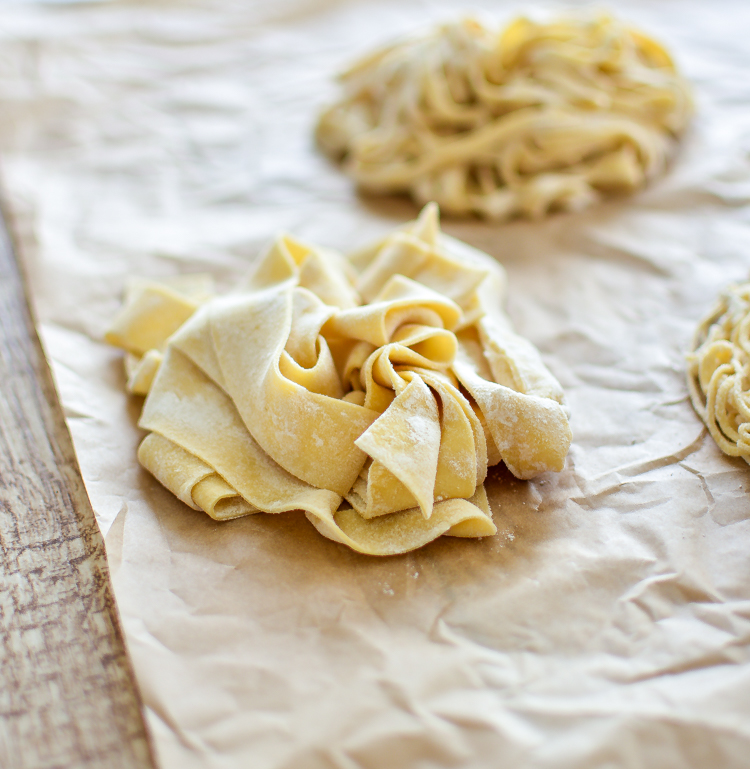
You may also dry the pasta in “nests.” Place “nests” of pasta on a piece of parchment paper and dry fully on one side, about 4-5 hours. Flip the nests and dry on the other side, about 2-3 hours.
Store your pasta in an airtight container for about a month.

I hope I haven’t confused you guys too much today. As always, I am only an email away if you have any questions! Making pasta is really very simple when you get the hang of it, and I definitely think investing in the appropriate pasta attachments is totally worth the cash. I hope you guys have a wonderful weekend! See you all on Sunday! xo
HOW TO: Fresh Homemade Pasta
Servings:
1 .25 poundsNutritional information is only an estimate. The accuracy of the nutritional information for any recipe on this site is not guaranteed.
Ingredients
- 3 large eggs
- 2 1/2 cups all-purpose flour more as needed, extra for dusting and rolling out
- 1 tablespoon olive oil
- 1 teaspoon kosher salt
- 1 tablespoon water more as needed
Instructions
- NOTE: There are images above to guide you where needed. This recipe requires, at the very least, something to roll out the pasta. You may do this with stand mixer attachments, a hand pasta roller or by hand with a rolling pin. Please note that making pasta completely by hand will take longer.
- NOTE: If preparing the pasta without a stand mixer (with paddle and dough hook attachments), place the flour on a large surface and create a well in the middle. Add the eggs, oil, salt and water. Fold the ingredients together by hand until a soft dough forms then knead for 3-4 minutes by hand.The amount of ingredients can vary depending on humidity, size of eggs, and/or other conditions.If properly sealed, dough will keep refrigerated for about 24 hours
Instructions for Stand Mixer
- If you are preparing the pasta dough by hand, meaning you don't have a stand mixer, then skip below to the "notes" section for instructions.
- To the bowl of your stand mixer, with paddle attachment fixed, add the eggs, flour, olive oil, salt and water. Mix on low speed for 2-3 minutes, or until the dough starts to come together. Switch to the dough hook attachment, and knead the dough for 4-5 minutes or until soft to the touch and pliable. If the dough is too sticky, add flour in small increments. If the dough cracks or seems too dry, add water in small increments until you reach the right consistency. Once your dough reaches the right consistency, form it into a disk and wrap it tightly in a piece of plastic wrap. Set aside for at least 30 minutes or up to 2 hours.
- Unwrap your dough and place it on a generously floured surface. Cut it into 4 equal size pieces. Flatten them out with your finger tips (image above).
- With the roller attachment fixed to your stand mixer and set to the lowest setting (1 for KitchenAid), insert the dough through the top. Once it goes through, fold the dough in half. Flour your dough and run it through a second time. Repeat this step, if necessary, flouring when needed, until the sheet is smooth and elastic. Increasing the setting by one step (2 for KitchenAid), insert the sheet again, but don't fold it over this time. Increasing the setting by another step (3 for KitchenAid), insert the sheet once again. Repeat these steps up to your desired thickness. For example, if preparing spaghetti, you will want to go to the 6th setting. (See steps above in the post for instructions on rolling dough out by hand).
- Change the attachment to the appropriate cutter. Generously flour the dough, and insert the dough carefully through the top of the attachment. Once you have the pasta cut, toss with a little bit of flour to prevent it from sticking. Set aside, covered with a damp paper towel until ready to cook.
If Your Making the Dough and Kneading it by Hand
- If preparing the pasta dough without a stand mixer (with paddle and dough hook attachments), place the flour on a large surface and create a well in the middle. Add the eggs, oil, salt and water. Beat the egg mixture with a fork to break up the eggs and then fold the ingredients together by hand until a soft dough forms then knead for 3-4 minutes by hand. Form it into a ball, cover it with plastic wrap and set at room temperature for 30 minutes.
- Roll the dough out to 1/4-1/8 inch thick on a generously floured surface. Fold it over and then roll it out again to 1/4-1/8 inch thick. Repeat this one more time. Continue instructions for cutting the dough into noodles without a pasta cutter.
If You Don't Have Pasta Cutters
- Follow each step from above up until you reach the pasta cutting stage.
- Place the pasta sheets on a large cutting board, and cut strips about 1/2 inch thick (or your desired thickness) with a sharp knife.
- Continue with the instructions from above.
Cooking your Pasta
- Bring a large pot of salted water to a boil. Add the pasta and cook until al dente, about 2-4 minutes for fresh pasta.
- Serve with your favorite sauce.
Drying your Pasta
- If you wish to dry your pasta for later use, you may do this in a couple of ways. If you have a drying rack, it is best to prepare your pasta as explained above and then drape it over a drying rack until completely dry. This time with vary upon your conditions, but will normally take about 8-10 hours in a dryer climate.
- You may also dry the pasta in "nests." Place "nests" of pasta on a piece of parchment paper and dry fully on one side, about 4-5 hours. Flip the nests and dry on the other side, about 2-3 hours.
- Store your pasta in an airtight container for about a month.


26 Responses
This is so awesome! I’ve never made my own pasta, I think we need to have a pasta making party in the near future!
OMG WHAT?! UHHH, YEAH we do! Thanks girlfriend! <3
This looks amazing Justine! I made my own pasta a few years ago, and it was so much work, and not even that good so I haven’t tried again since. But I’m sure I just didn’t use a great recipe because it SHOULD be amazing if it’s made from scratch! Definitely going to give your recipe a try!
It is definitely a lot of work, Stacey. It’s taken a long time for us to get it right! Thank you so much girl!
This is such a great tutorial! In my childless days I definitely made my own pasta a lot more. I need to do that again!
You’re adorable, Ashley. Thanks girl!
Hats off to you lady! This is so impressive. Way to go!
Thank you so much, Erin! <3
This is a great tutorial, Justine! I have a pasta machine but don’t use it often enough and I’ve had the itch to lately. It’s so much easier than people might think, and there’s nothing like fresh pasta! :)
You NEED to use it Marcie! There is nothing like it. ;) Thanks girl!
I tried it once with whole wheat flour. I faced a lot of challenges while making it. 1) It was touch to cut with knife as i folded the sheets and then cut it. This way it was sticking to the folded part. It was touch to open & segregate the cut pasta.
2) I put it to boil after 10 minutes. But it all got so soggy.
I never tried it again as I am afraid that it won’t come out well. I made everything by hand as i don’t have this machine.
Please help & suggest.
hi! Can I freeze my extra pasta dough?
Hi Caitlin! I’ve honestly never frozen pasta dough. I usually always make pasta out of whatever is leftover and then dry it out for a later use. I have read that people have had success freezing pasta dough, however. I think the most important thing is to make sure it is sealed very tightly because it can dry out very easily. When you go to thaw it out, put it in the refrigerator. Some have had better luck than others, so good luck! I hope it works out!
Used this tonight to make our own homemade pasta!!!! It was amazing….thanks for your recipe!!!
I’ve never made homemade pasta, and I don’t have a pasta machine, but I think I will try this today! Your instructions were clear and easy to follow, thank you for that! Please stay safe during these trying times and God bless!
Awesome Recipe! Tried it out last night.. delish!
In this time of quarantine, it is a perfect time to try new things, and I appreciate the recipe and technique. This will be a keeper for sure!
This is amazing. My first time making pasta and I love it. I used my kitchen-aid but no pasta attachment so I used my rolling pin to roll it out.
I made this dough two days ago and wasn’t able to roll it out. It’s been in the fridge for in a ziploc. Can I still use it?
my dough was not what I would call soft and pliable, it was a little hard and tough. Do I scrap it, or is it ok? I do live in Colorado, so I had to add about 1.5 Tablesoons of water to get it to a dough state.
If I put in the freezer, how to I cook it? Thanks!
Just wanted to ask I have triple 000 flour can. use that instead of the all purple and if so the same amt? 2.5 cups ? Also does humidity or temp affect this if going to dry the remaining pasta on my pasta dryer? Many thanks.
Thank you, I make a lot of homemade pasta. Lately papperdella a lot. Mix flour with semolina at about 1 to 1. My kitchen aide has been over worked and need to replace some of the gears. The hand crank unit still working fine. Love fresh pasta.