
 It’s been, what I would call, a lifetime of tradition in my immediate family for baking cookies around Christmas time. As far back as I can remember, my mom has been the eyes and ears of this operation: always making sure she made our personal favorites and always making sure there were more than enough to go around. Although, we didn’t always love the idea of having to wait to eat them! She would allow us to eat one, maybe two when she was baking. No kidding. She stored them in the garage and would most likely know if more went missing than were supposed to go missing. Not only were these cookies a part of our family, but also a part of our extended family and friends who received them for Christmas gifts every year. Well now I live about 1700 miles from my mom, but I am still carrying on this tradition. Many of these recipes are derived from something I learned from her or from some cookie she once made, give or take a few =). Maybe next year we will live close enough to each other that we can continue carrying on this tradition together! Or maybe she should just move to Colorado! Who’s with me!?
[sc:adsense1]
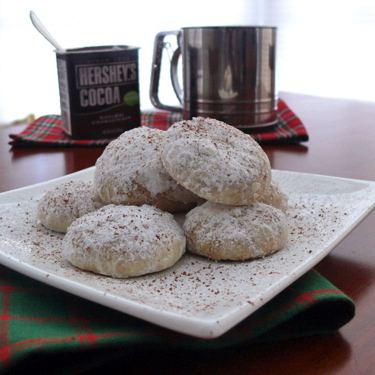
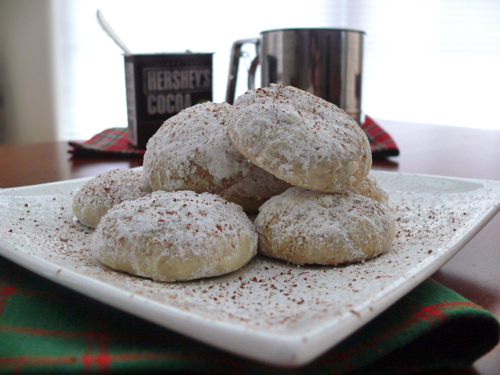
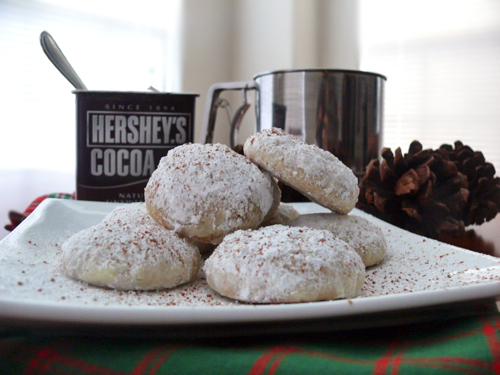
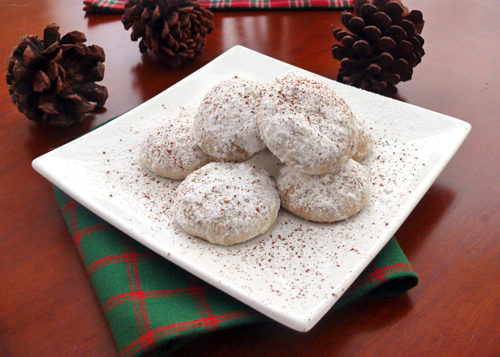
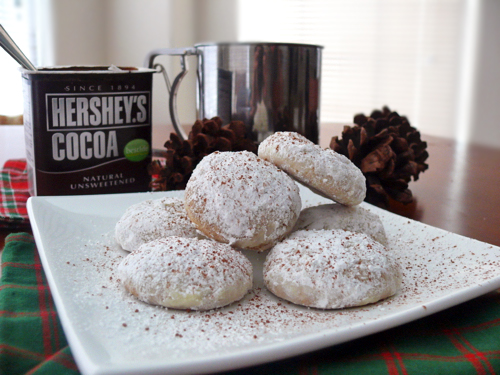
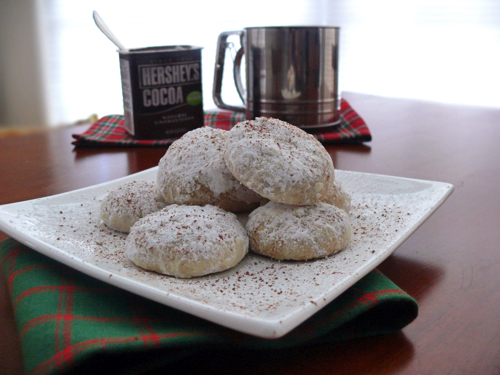
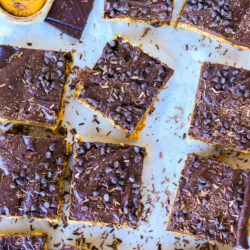
These Snowball Cookies are another one of those recipe ideas I got from my mom. I think she used to make them with almonds…I’m not sure. She can correct me if I’m wrong =). Anywho, I tend to be more of a fan of hazelnuts than almonds. Let’s be honest, almonds are everywhere! Let’s spice it up a bit, and add a different kind of nut =). You could really substitute whatever kind of nut you want. You will be grinding it into a powdery dust anyway. Walnuts are another great idea. I suggest not using peanuts though…they’re not even a nut.
 |
 |
This is a recipe that any one of you can handle. It doesn’t take very much time nor work. The only thing that could help your patience in running out, is the waiting game. I believe this dough needs to be perfectly chilled before you start handling it. I find that letting it chill in the refrigerator for at least 1 hour and 30 minutes completely necessary. Any less time and it’s just much too warm. You could even leave it in the fridge anywhere up near 12 hours and you would be fine. This is a very good “make the dough the previous evening and make the cookies in the morning” type of recipe. So try it this way if you don’t feel like waiting.
 |
*Please Note* that in the recipe, I have a prep time of 2 hours. This recipe does NOT take 2 hours to prep. It takes about 30 minutes. The extra hour and a half comes from the fact that it has to sit in the fridge for at least this amount of time. There is no little box in my recipe “widget” that allows for an “inactive time.” Weird I know, so for future reference if it looks like the prep time is longer than normal, this is why. I’ll be sure to mention this in every future post that this occurs.
 |
The ingredients in these cookies are simple and matter of fact. This is another one that you probably have most of the ingredients sitting in the back of your pantry somewhere. I would even suggest using the extra nuts you find in your pantry for these cookies. It’s a very good recipe to use when you’re trying to get rid of all of those extra nuts you don’t know what to do with.
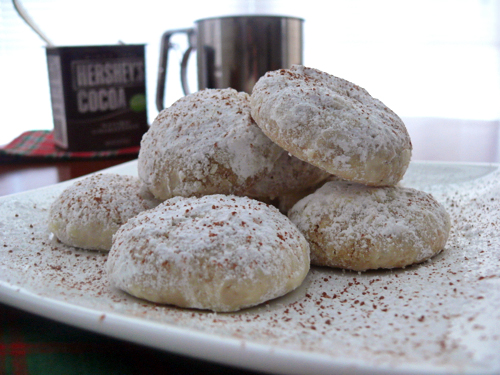 |
I’m sure that many of you have seen some variation of this recipe before. This is another popular Christmas cookie, but it is a favorite of many so don’t skip it! I like to top the end result cookie off with another dusting of powdered sugar and cocoa powder. It adds a wonderful taste, and it makes them look pretty too =) win win!
 |
[amd-zlrecipe-recipe:170]


8 Responses
Beautiful! They are great with a pot of freshly brewed coffee or tea.
Thank you! I think I will have to try that…right now =).
Hazelnuts are probably the best nut ever and I love what you have done here with these cookies.
We agree completely!
I made these and sent them along with other types of cookies to my family. Unanimously everyone thought these were the best. =)
That’s so awesome! I’m so happy they came out tasty! Yay! =)
I made these cookies today. They are really great! I love everything with hazelnuts, and as soon as I saw your post on RecipeNewZ I added it to my favorites. I followed the recipe exactly, which is really rare for me. And it turned out delicious :-). And the cookies look adorable :-). Thank you for the recipe and Happy Holidays!
Tomorrow morning I will also try them with freshly brewed coffee, as Angies suggested in the previous comment :-)
p.s. I posted the recipe on my blog and linked back to you
I am so happy that they worked out for you! They are so great with coffee! RecipeNewZ is great sometimes =). I checked out your blog, and I’m in love. There are some truly great recipes on there. I hope you have a great week and Happy Holidays!